Previously, I told you that I sold my Leica Q2. I don’t miss the camera but I do miss the macro/close-up ability of that camera. I don’t take pictures of bokeh balls, flowers, and bug eyes but from time to time I need to get detail shots.
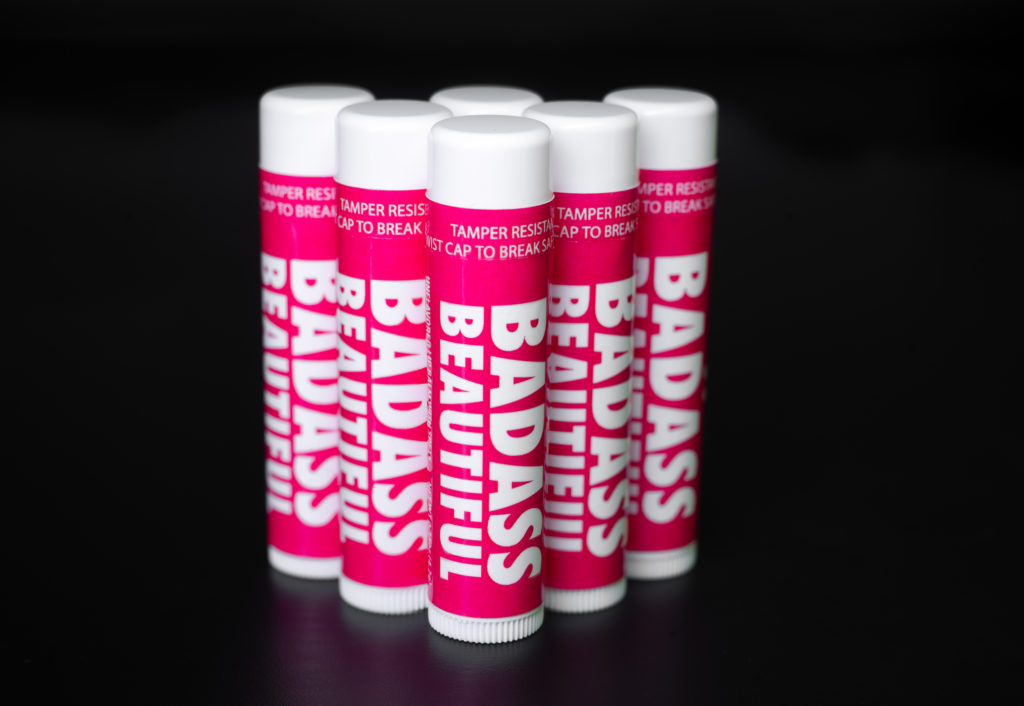
I generally keep an inexpensive 90mm lens in my bag just so I can get quasi close up-shots if I need to. Unfortunately, sometimes that workaround doesn’t actually work. The main issue with the 90mm workaround is that there are some situations where the focal length gets in the way. For example, recently, I needed to get a closeup shot of a logo on a jersey but there was a concrete wall right behind me so I had to move the model. There was just no way to use a 90mm lens in close proximity to the model. Hassle.
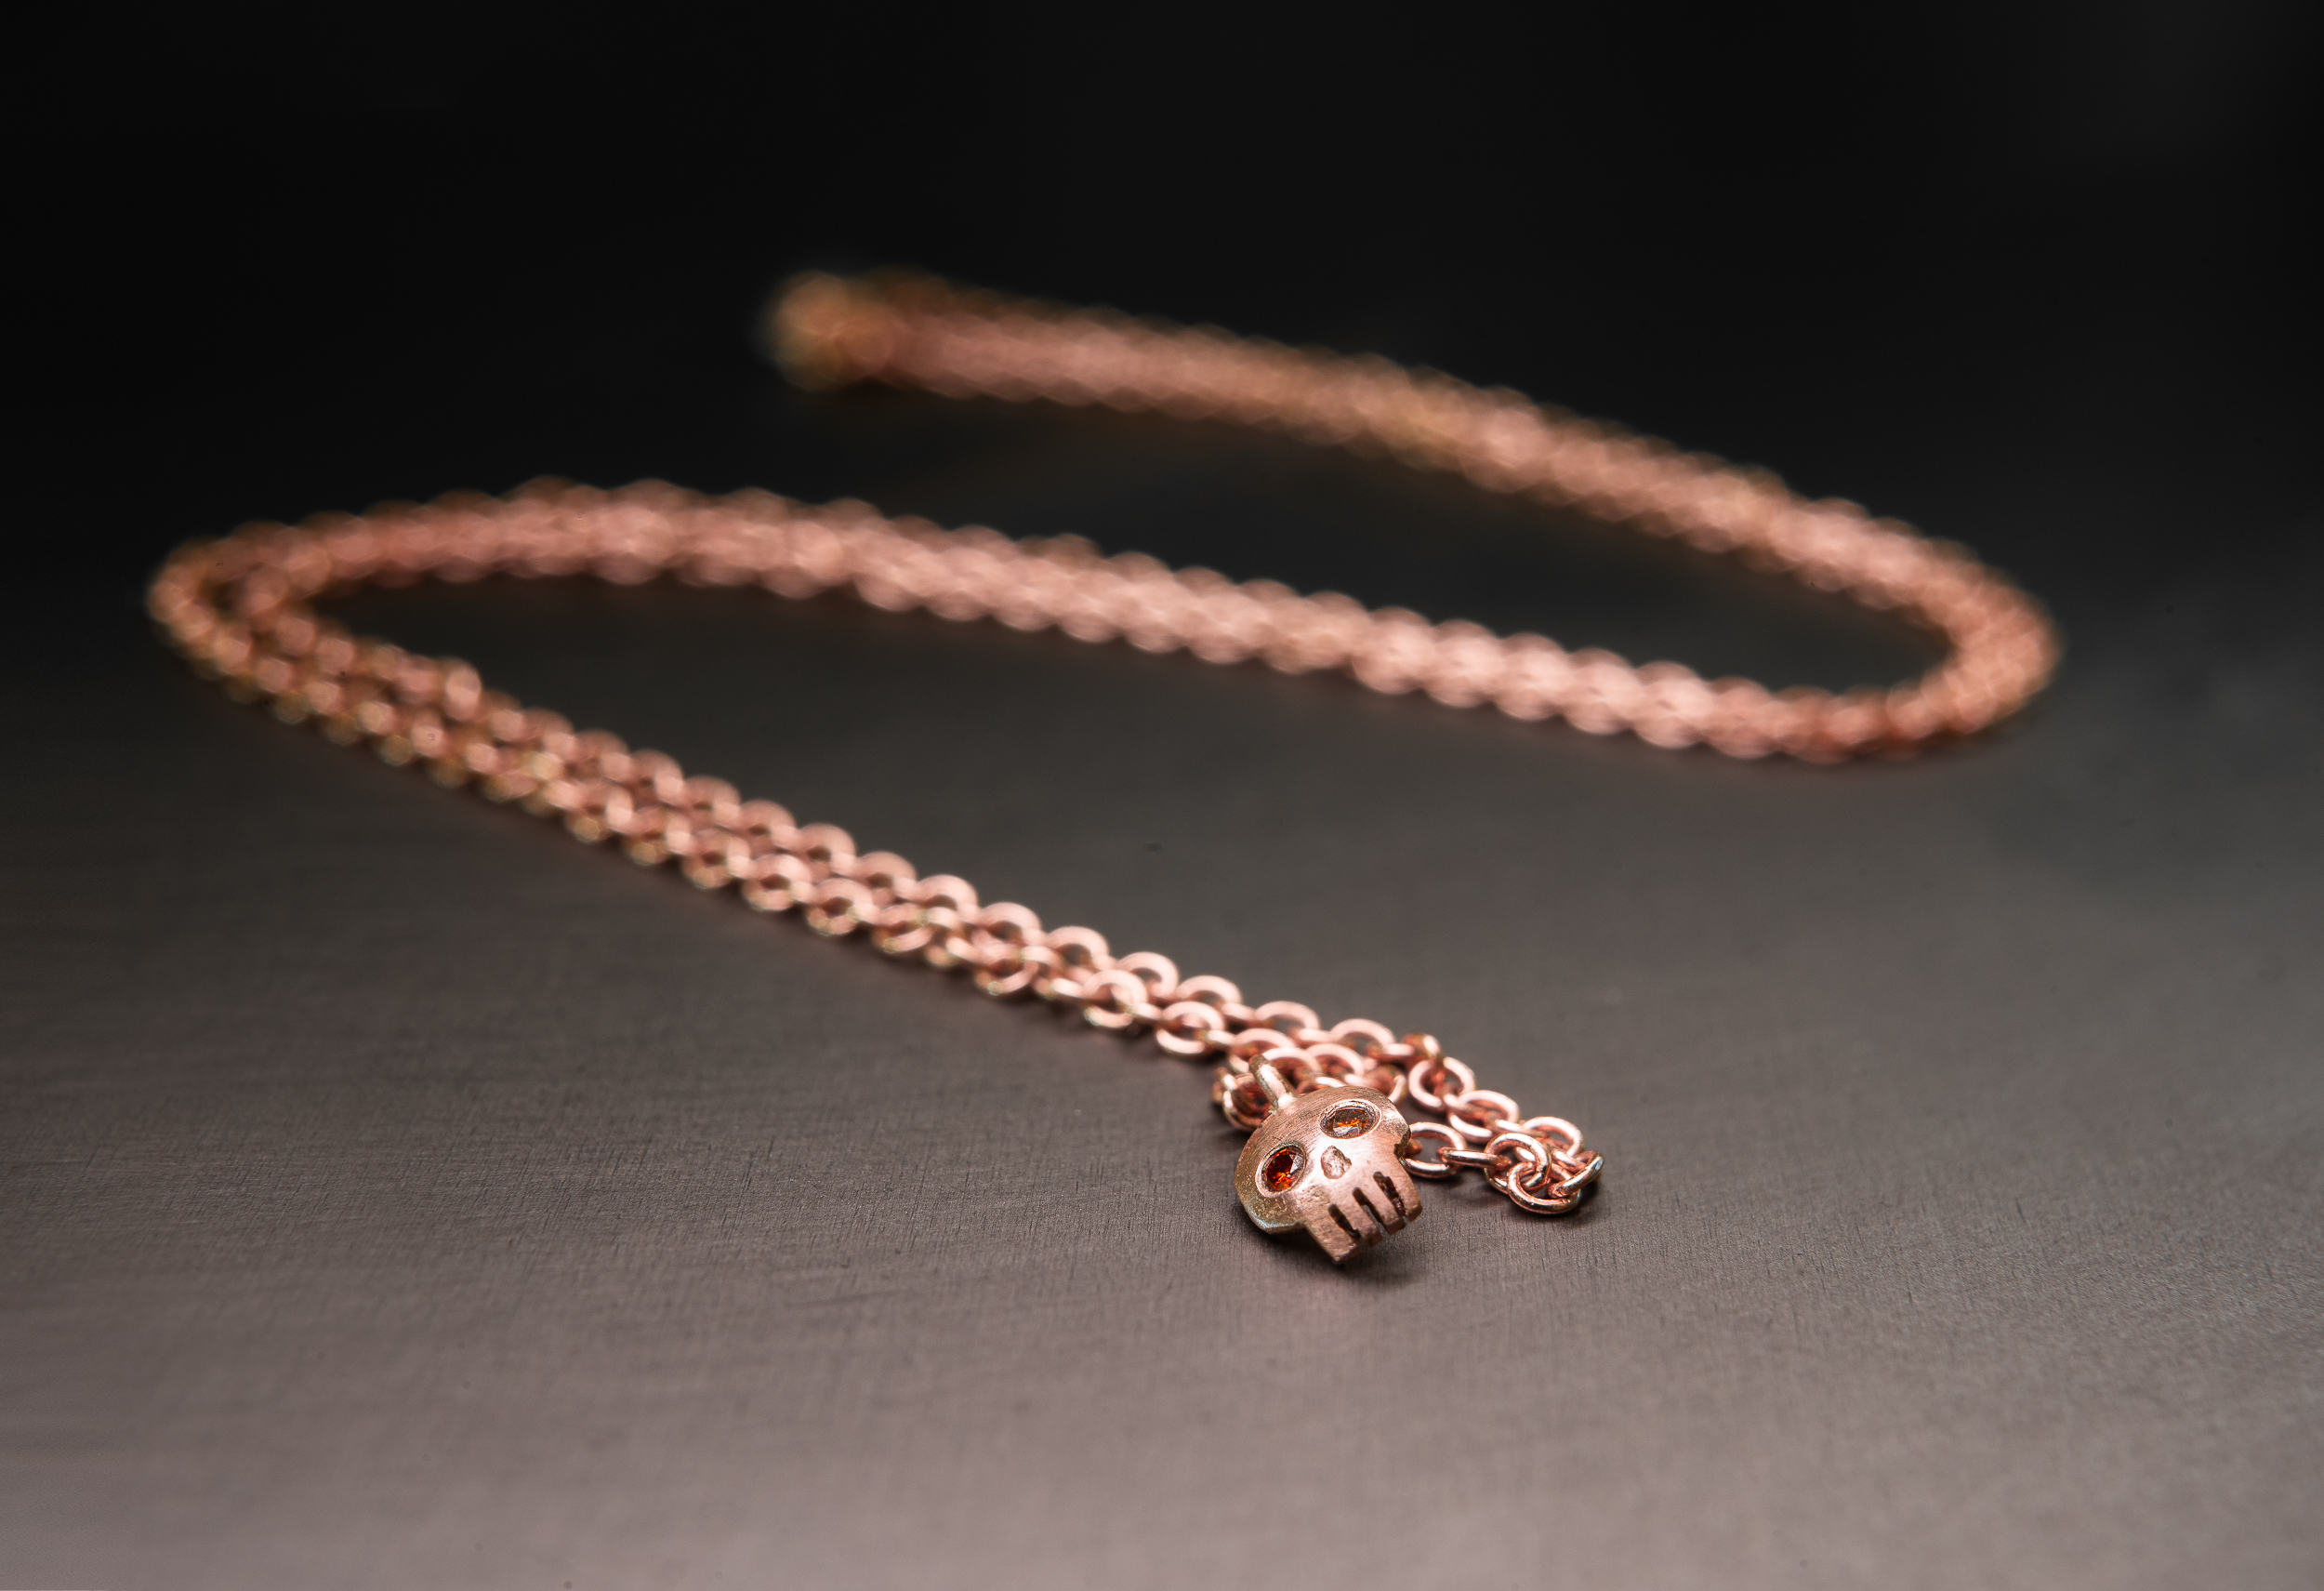
If you use a rangefinder long enough, there is a good chance that you will eventually need to find a way to shorten the focusing distance on your (digital) rangefinder or adapted rangefinder lens to get closeup and macro images (1). I recently took a deep dive into the world of options available for macro and closeup photography with Leica and other rangefinder lenses.
Many options – few good ones
There are all sorts of options to get macro and closeup images with rangefinder lenses. Most of them are pretty janky. Let’s be honest, all of these are workarounds. If you are really into macro photography, before you spend any money on the following options, please keep in mind that your best bet is probably to get a dedicated macro lens. If, however, you are like me, you have 2 Leica rangefinders in your bag, you don’t want to carry around a dedicated macro lens, and you just want to punch in close from time to time, there are some options. This is not an exhaustive list. Things like bellows and other legacy options are not discussed because they are either not practical for casual macro/closeup photography and/or essentially collector items at this point.
1. Leica Macro-Elmar-M 90mm f/4 + Leica macro-adapter-M V2: coming in at around $5000 the most expensive option is the best. The Macro-Elmar-M 90mm lens isnt really a macro lens but when combined with the Leica Macro-Adapter-M extension tube it becomes a macro option that, unlike other extension tube options we will soon discuss, allows you some flexibility in the FOV and allows you to maintain infinity focus because 1) the lens collapses and 2) the Macro-Adapter-M has an internal helicoid. This helicoid/collapsing lens combination is a benefit over other extension tube options which overcomes the single FOW limitation of other extension tube options. With a single FOV, you will be moving the camera or subject back and forth to focus which is a botheration (2).
2. Adapt any dedicated macro lens to your digital rangefinder: the clunkier option is the second best option: You can get adapters to adapt lenses from any legacy lens mount to your digital rangefinder. I encourage you to consider getting any old macro lens from any old vendor. If you want to stay with Leica, how about the 60mm f/2.8 Macro Elmarit R or the 100mm f/2.8 Macro Elmarit R. Nothing against Leica R mount lenses but they are expensive. I would be willing to bet that maybe, just maybe, Nikon, Canon, Olympus, Minolta, or Contax/Zeiss made competitive offerings at some time over the last 30 years. The main benefit of a dedicated macro lens is that you get the full focusing range of the lens. This is a huge benefit that obviate the botheration (2) fiddling with extension tubes. The downside, is that you will need to keep a dedicated macro lens in your bag which is a dealbreaker for me given that I am only after macro and close focusing for casual use when I am not at home or in the studio. When I am home and/or in the studio, I use a dedicated macro lens.
3. Leica Macro-Adapter- M v2: We talked about this one already in #1 above. It works with any lens. You dont need the collapsible 90mm Elmar. The main benefit of this option (which I already discussed but it bears repeating) is that it has a focusing helicoid to give you some flexibility in the FOV and focusing without fiddling around with different extension rings. The downside is that it is relatively expensive. If you can afford it, you need something ultraportable, and you are not ready to commit to a dedicated macro lens, this is the option I would go with. If you are a budget limited normal person, keep reading.
4. Leica Macro-M V1: The original Macro-Adapter-M looks like the old goggles that went with some legacy rangefinder lenses. The benefit is that it is the only option that will work with film rangefinders becasue it allows you to use the rangefinder to focus. The downsides are that it is large(ish), expensive, clunky, and is only compatible with a few lenses. The downsides outweighed the benefits for me. This one wasn’t even a consideration. Your mileage may vary.
5. Leica Elpro 52 (or other close up lens): This piece of kit attaches to the front of the lens. I have no opinion on it at all but I opted not to try this as my solution because I dont like keeping track of adapter rings and/or worrying about stray pieces of glass in my bag. The Elpro 52 has 52mm filter threads. To use it on other lenses you will need step down rings. Step down rings are a botheration (2) I always seem to lose and lose track of since I have multiple lenses with different filter threads. Your mileage may vary.
6. 7 Artisans photoelectric close focusing adapter: this piece of kit looks to be a copy of the Leica Macro-Adapter-M v2. Unlike the Leica Macro-Adapter-M, however, it gets terrible reviews on B and H. That was all I needed to see. I have had some pretty bad experiences with lens adapters that didn’t work properly so I generally only use Novoflex or Raquel adapters when I can. I am not going to risk damage to a lens mount or the mount on my camera to save a few dollars. If you go for this option, please let me know how it works.
7: Novoflex Extension Tube Set Leica M: For normal people, there is the Novoflex Extension Tube Set Leica M. TL;DR this has a permanent position in my bag but using it is a botheration (2). The rest of this post is concerned with the Novoflex extension tube set.
An introduction to the Novoflex Leica M extension tube set
If you have never used an extension tube, the concept is simple. You just mount the extension tube (in this case ring) between the lens and the camera and you are ready to roll. The gap between the lens and the camera magnifies the image and decreases the minimum focusing distance.
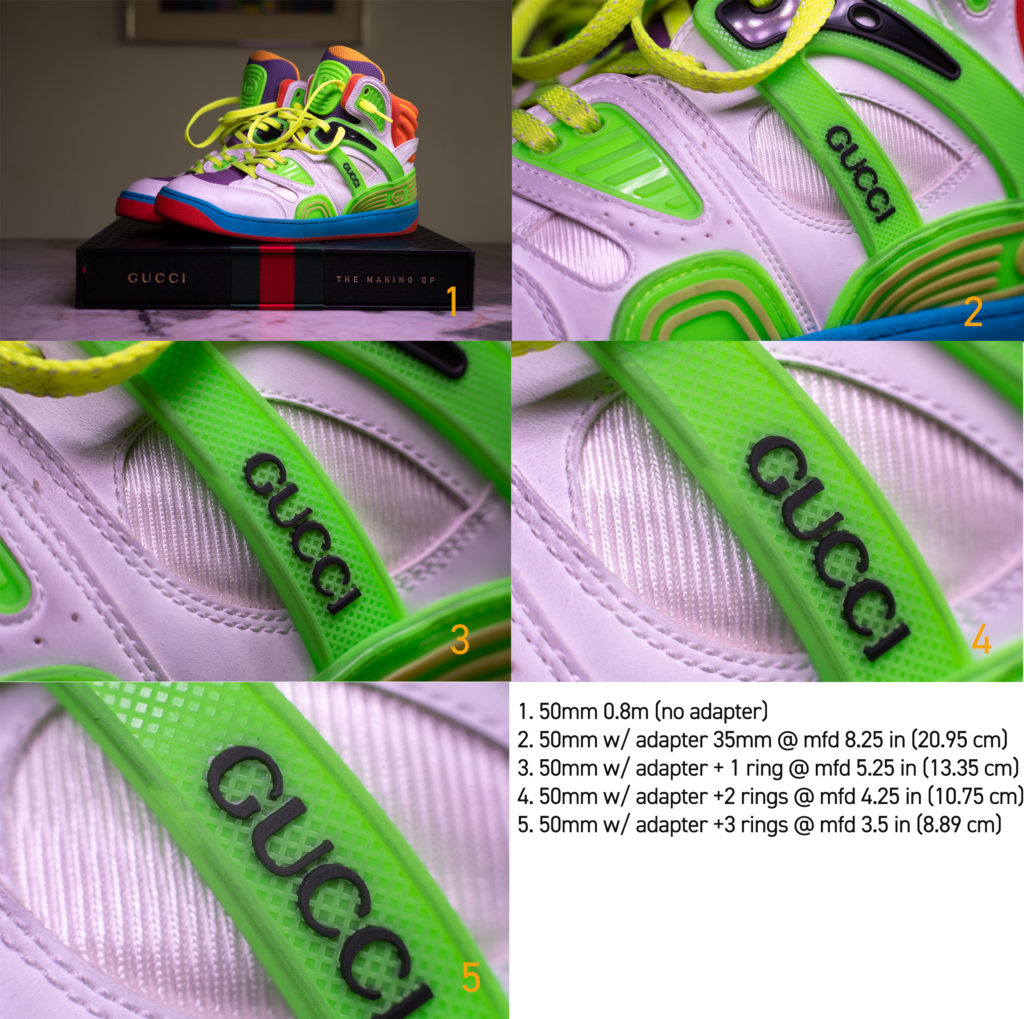
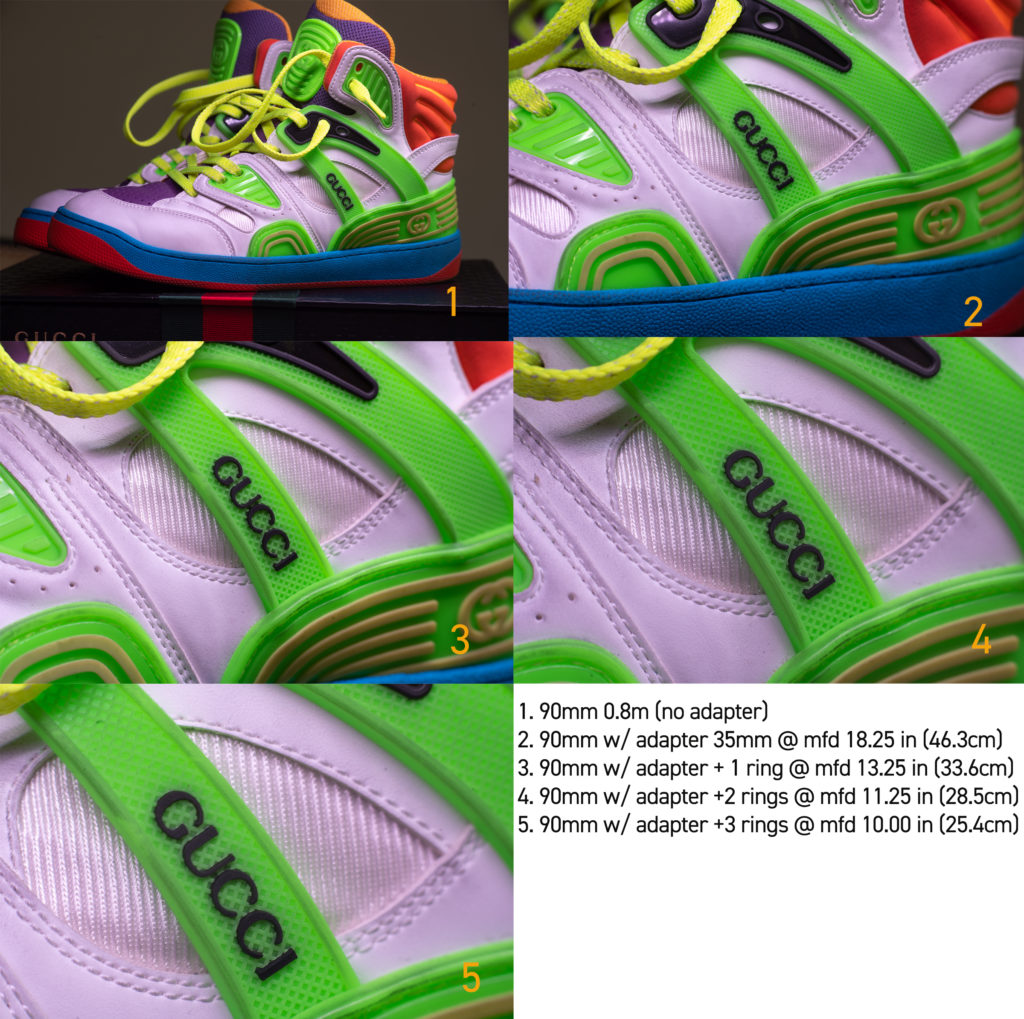
In practice, however, extension tube sets are a botheration (2) because with each image and each scene it takes some trial and error to figure out which lens focal length will work with which adapter. With the Novoflex extension tube set you can use 1,2,3, or 4 adapter rings. The more rings you use the more magnification you get. The issue is that as you increase the number of rings, you also decrease the depth of field, decrease the field of view, and increase the amount of light you need to make an image.
Given all of the variables, at least for me, determining which focal length and how many rings will work for a scene isn’t entirely intuitive. This leads to a trial and error situation where I am fiddling with taking rings on and off and moving tripods here and there which I find to be a botheration (2). I would say it is about as painful as watching Season 8 of The Bachelorette (3) (4)
I created this post as a cheat sheet for me to help me (more) rapidly sort out what combination of lenses and rings will work best without too much fiddling. Maybe you will find it beneficial.
It might be of interest to note that this is not an exhaustive introduction to macro photography – not by a long shot. This is about as much macro geekery I can take before my eyes glaze over. There are all sorts of calculators (macro photographers seem to like math) to help you calculate macro things and an underworld of people who can help you understand what those numbers mean. I am not one of them. I need to get closeups from time to time and get out. If you are doing macro with rangefinder lenses, there is a good chance you are in the same boat. If not, you would probably be using a different tool.
Tips and tricks for macro and closeup photography with Novoflex extension tubes and rangefinder lenses.
- With all focal lengths and even with just one ring, you are zooming in on the image ALOT. there is no combination which will allow you to photograph a scene. Even if you use just a single ring, you get a super zoomed image and that is it. You can’t dial in just a little bit of zoom.
- Once you put the ring on your lens, the focusing helicoid on your lens is only good for very fine/ micro, adjustments. You will be focusing by moving your camera or the subject. Once you put on the extension tube you have an extremely narrow focusing range. Think of it this way, your minimum focusing distance almost becomes the same as your maximum focusing distance at infinity.
- A tripod is ideal but not a requirement. If I have the time I use a tripod but if you don’t have a tripod don’t freak out. If there is enough light, I hand hold my Panasonic S1. The ISO performance and the IBIS obviates the requirement for a tripod if you limit yourself to using only one or maybe 2 rings. The M10 is a bit more finicky because it doesn’t have IBIS and there is a delay when shooting in live view that always seems to cause some motion. This isn’t 1980. Ignore what you read on the internet. You can do macro without tripod if you are OK with wide apertures, a pretty shallow depth of field, and maybe some noise.
- Shooting wide open really gives you an extremely shallow depth of field no matter what lens or ring combination you use. I can’t say that I really ever shoot wide open when using the Novoflex extension tubes.
- Close-up photography using extension tubes maximizes the crumminess of crummy lenses. If you saved some money buying inexpensive rangefinder lenses, you might get burned. For example, my Minolta M-Rokkor 90mm f/4 is great for normal use but isn’t all that sharp and can have pretty miserable chromatic aberrations when used as a macro/closeup lens.
- As a corollary to #5, as you add rings (e.g. the closer you get), things get pretty demanding for your lens. To overcome these limitations you will be stopping down which requires light. There is a trade off between light and understanding how cheap you were when you bought your lenses.
- I can’t see ever using more than one ring with a wide angle lens. With the wide angle lenses, the focusing distance is so close to the subject, it is difficult to light the scene without shadows from the camera and my head getting in the way. Unless you have a very small head, these macro rings are not meant for wide angle lenses.
- The amount of zoom you get with longer focal length lenses is less than wider lenses. There seems to be a point of diminishing returns if you are going to plan on using a focal length longer than 90mm.
- You need extra light with a macro lens but don’t lose your mind thinking you need to light every scene. The loss of light I see (even with all of the rings) is only about 2-3 stops. You are using these on a digital camera. Modern digital cameras can handle an extra 2-3stops without too much ISO. If additional light is needed and I don’t want to set up any strobes, I use a wand like the Westcott Ice Light. There are inexpensive knock offs but if you go cheap, remember that they stole the idea from Westcott. You are supporting thievery.
- To obtain focus you will be moving the camera. Turning the focus ring helps with fine focus but you are going to have to move the camera (or the subject) to obtain focus. This is a pain with a tripod. I ordered a super inexpensive macro slider tool. I use that at home and in the studio but I don’t keep that in my camera bag. Too much equipment.
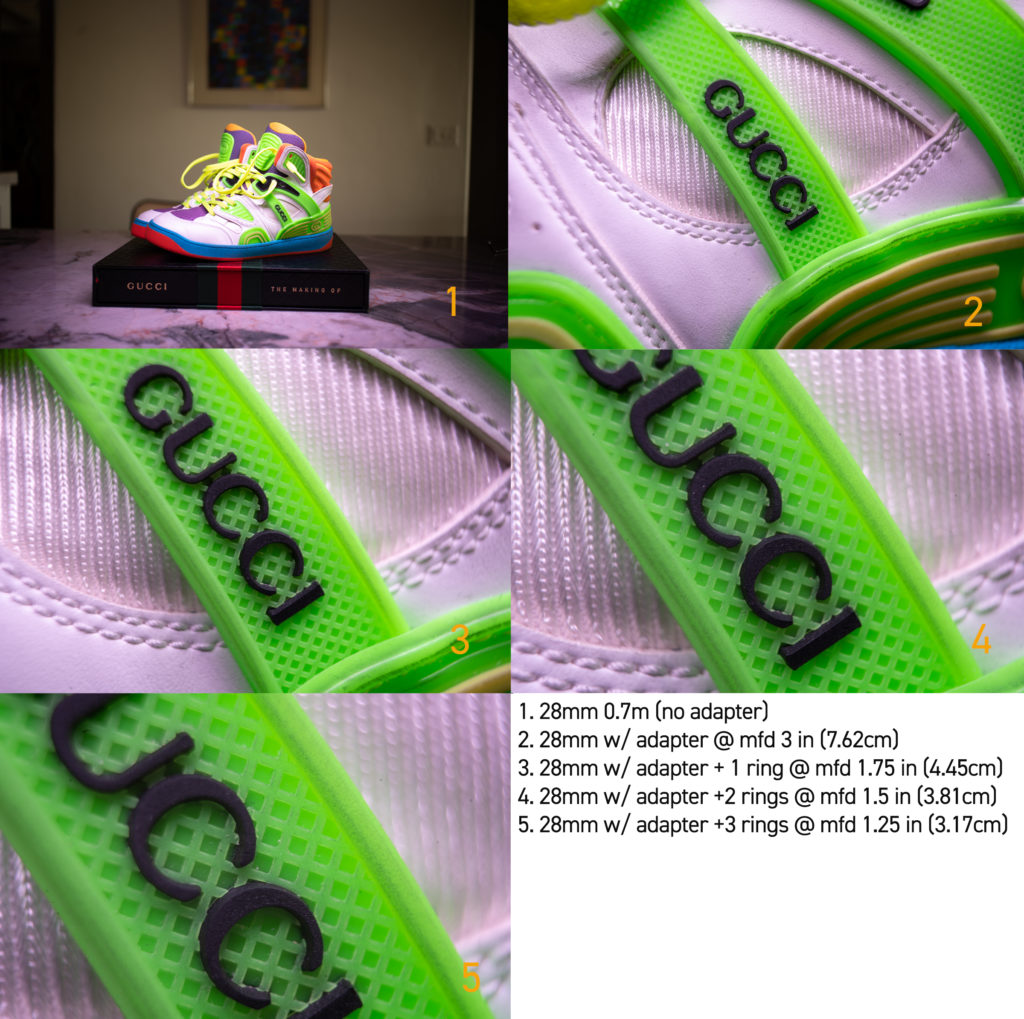
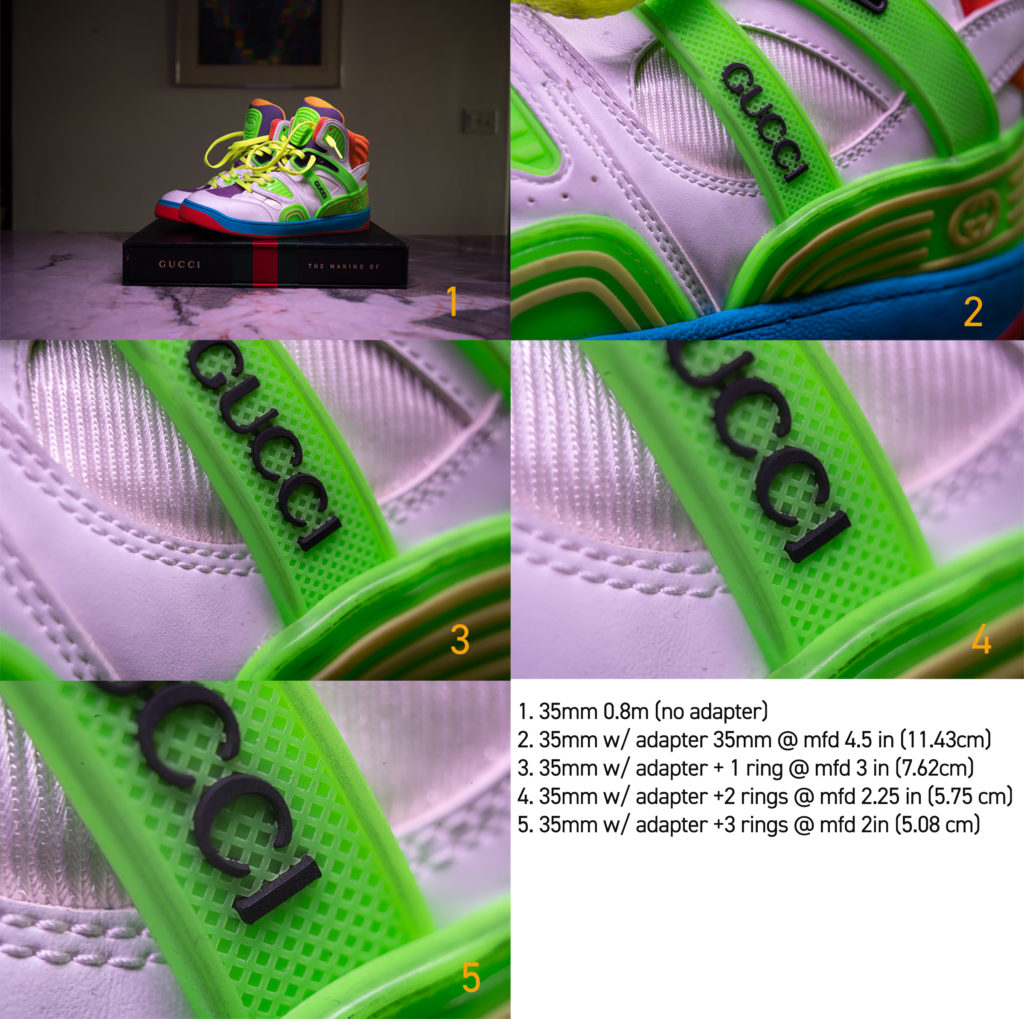
- I almost never use more than 2 rings. Look at the images below. You get the biggest jump from the first ring, a solid jump from the second ring, and then you get only a bit more zoom with rings #3 and #4 but that extra bit of zoom comes at the expense of further decreases in the depth of field and additional light requirements. Truth be told, I only keep 2 of the rings in my bag.
- I most often use a 50 or 90mm lens with these rings. I don’t have a 75mm lens but my bet is that 75mm would be ideal.
- Lucky number 13 is a big one. Focus stacking images obtained with the Novoflex extension tube may be a botheration (2). The reason is simple. In order to obtain different images with different points of focus, you will need to move the camera, move the subject, or adjust the focus ring. Unlike a dedicated macro lens, these maneuvers not-so-subtly change the image so focus stacking can be a pain. I believe that the reason is that even though you are adjusting the microfocus you turn nearly the whole range of your focusing helicoid. This creates a significant difference between images you want to focus stack. I don’t have this problem when I use a normal macro lens.
Test images
Below is a series of images I use as a reference. NOTE: this isn’t science. I took a ruler and did a measurement. I didn’t use calipers. My numbers might be off by a centimeter or so. I was also using Summarit lenses so the close focusing was 0.8m for the 35 and 50mm lenses. Looking back I should have used something with the normal 0.7m close rangefinder focusing. My apologies but I don’t think that would change the results appreciably. When I was doing this, I wasn’t actually planning on posting it. Please consider this is as a rough estimate and starting point for discussion.
The guide to the series is in the lower right box of each image. The first ring is the adapter. Stated another way, there are 4 rings but ring #1 is the adapter. The way the Novoflex extension tube set works is you put on the adapter and then add rings 1,2, and, 3.
Bottom line:
Rangefinder lenses aren’t the best option for macro photography. Your best bet is to adapt a dedicated macro lens to your digital rangefinder. If, however, you are committed to rangefinder lenses for any reason, and you have a digital rangefinder or you are adapting your rangefinders to a digital camera, all you need to do is carry a piece of metal in your bag and you can now take close-ups. The process is fiddly and this is a kluge (don’t lie to yourself and think it isn’t) but the images can be stunning. If you ever see me on the street (4), I will have two of the Novoflex Leica M extension rings in my bag.
Notes
- Film photographers, you can leave now. Film options are limited. I suggest an SLR.
- The internet tells me that botheration is a synonym for “a pain in the ass.”
- Actually, any season. They are all painful. I was only asked to watch season 8. I barely survived. The pain is real.
- I don’t know why I said that. I don’t do street photography.
Sample Images